Anyone can squat. But you have to pay attention to many things. This checklist will help you to perform the exercise perfectly. We focus on the most conventional execution, the high-bar back squat, but most of the advice applies to all types of squats.
PREPARATION
1. BAR HEIGHT
Make sure the bar is at shoulder or chest height in front of you.
2. GRIP
Grab the bar with a full (not thumbless), medium-wide grip. Medium means with the little fingers inside the ring marks of the bar, just like the bench press .
Work on your shoulder mobility if it doesn’t allow for a medium-wide grip. With a wider grip you will be able to place your elbows less forward, tighten your upper back less well and involve your lats less well in the exercise. All in all, you get a less strong and stable squat.
Make sure your wrists are in a straight line with your arms. Sometimes that is not possible with a full grip and you will have to swerve to a thumbless grip. The disadvantage of this is that you can hold the bar less firmly. However, if you have a lot of wrist and/or elbow pain when squatting, a thumbless grip is the better option.
3. LIFT OUT
When lifting, your feet are under the bar, with your hips and knees bent as if you were doing a half squat. Now loosen the bar by squatting up a little bit.
4. INSTALL ROD
In a high-bar squat, position the center of the barbell on your top traps, at the base of your neck, with your shoulder blades squeezing. This means that throughout the squat you need to keep your torso fairly upright to keep the weight aligned with the center of your foot – the center of gravity.
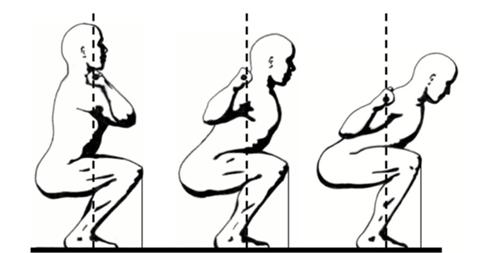 Squat styles: the front squat (left), high-bar squat (center), and the low-bar squat (right). Note that the placement of the bar on all three posts is aligned with the center of the foot.
When squatting, it is important that your upper back muscles bear the weight and not your hands, as with the bench press. The narrower your grip (see point 2), the more you can squeeze your shoulder blades together, the better your upper back muscles can support the weight.
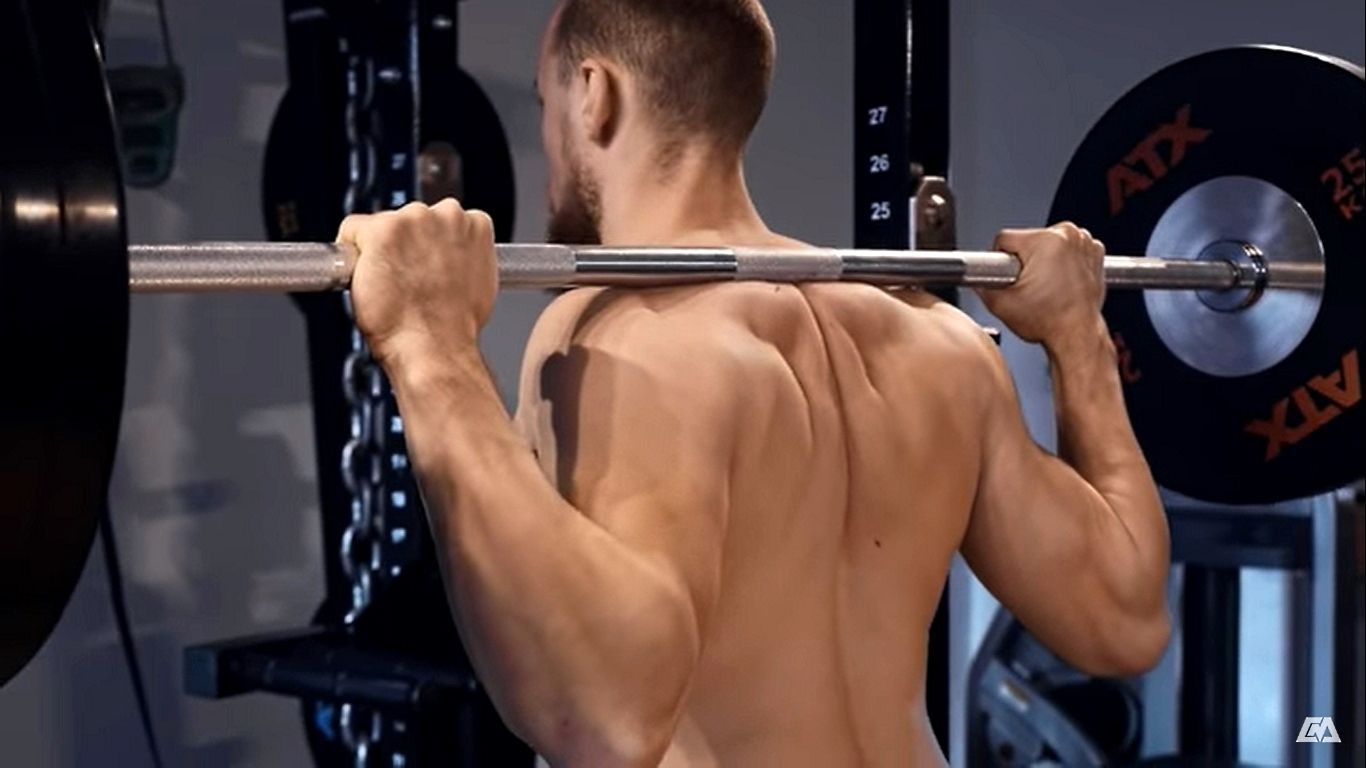 In the high-bar squat, the bar rests on your upper back muscles. (Source: YouTube / Calisthenicmovement )
Your elbows point slightly back; so do not position them directly under the bar.
5. RUN OUT
Don’t take the term running too literally. One step back (and pull your other leg in) will give you plenty of room to reach the barbell rests or rack. We often see people taking a few steps back or shuffling backwards. Dangerous and a waste of energy. Also remember that after a hard set you still have to walk forward to put the barbell back on the supports.
6. POSITION OF THE FEET
Place and keep your feet flat on the floor. Do not place them too close together, but also not too far apart. As a starting point, take a medium-wide stance, with your heels directly under your shoulders. From there you can easily slide around a bit, because the ideal foot position differs from person to person.
Avoid a very narrow stance: this will not give your stomach enough room to get past your legs.
With a wider stance, a sumo stance so to speak, you shift the training emphasis to adductors and the inner thighs. The sumo squat is therefore simply another exercise, which is not so friendly to your groin. So it’s better to leave that sumo stand out altogether.
7. DIRECTION OF THE FEET
Assuming a medium-wide foot stance, turn your feet out about 30 degrees so that your toes are pointing in the same direction as your knees. This is the safest position for your knee joint. In addition, you are stronger and you can squat deeper.
8. STABILIZE
Take some time to put your body under tension. Raise your chest, squeeze your shoulder blades together, bend your back slightly. Squeeze the bar hard so it can’t move and throw you off balance. Look straight ahead.
ECCENTRIC PHASE
9. BREATHE IN
It is important to take a deep breath before your squat and fill your lungs completely with air so that pressure is applied to your diaphragm. This creates pressure in your abdominal cavity (intra-abdominal pressure), which helps stabilize your spine.
10. BEND KNEES AND HIPS AT THE SAME TIME
It’s not just your knees that need to spring into action. You start the squat movement by bending your knees and hips at the same time. If you only bend your knees, they will reach too far forward. If you just push your hips back, you will lean too far forward.
Your knees move for the first half of your squat and then stay in place. Your hips complete the movement, around parallel or slightly lower (see below), while your lower back maintains a neutral position.
The bar thus moves in a vertical movement over the middle of your foot (see also the figure at point 4).
11. BAG CONTROLLED, BUT NOT SLOW
The faster you go down (eccentric phase), the stronger you are on the way back up (concentric phase). However, speed should not come at the expense of execution. So sink as fast as you can, while maintaining correct form. Normally you should be able to get down in one second.
12. LOWER TO AT LEAST PARALLEL
A squat is only a squat when your thighs are parallel to the floor. In principle, this is sufficient for muscle growth, but officially – from a powerlifting point of view – the tops of your knees should be just above your hips (see image). Regardless of mobility, this ‘official’ position should be feasible for most people.
HALF SQUATS
Don’t do half squats. You train your quadriceps with it, but your hips and buttocks remain unaffected. Moreover, you create an imbalance in your muscles and you risk knee injuries. If you don’t manage to go parallel, you are apparently using too much weight.
DEEP SQUATS
You don’t have to go Ass to the Grass (ATG); squat to parallel is sufficient. If your mobility allows it, you can go a little lower, but that means you can use less weight.
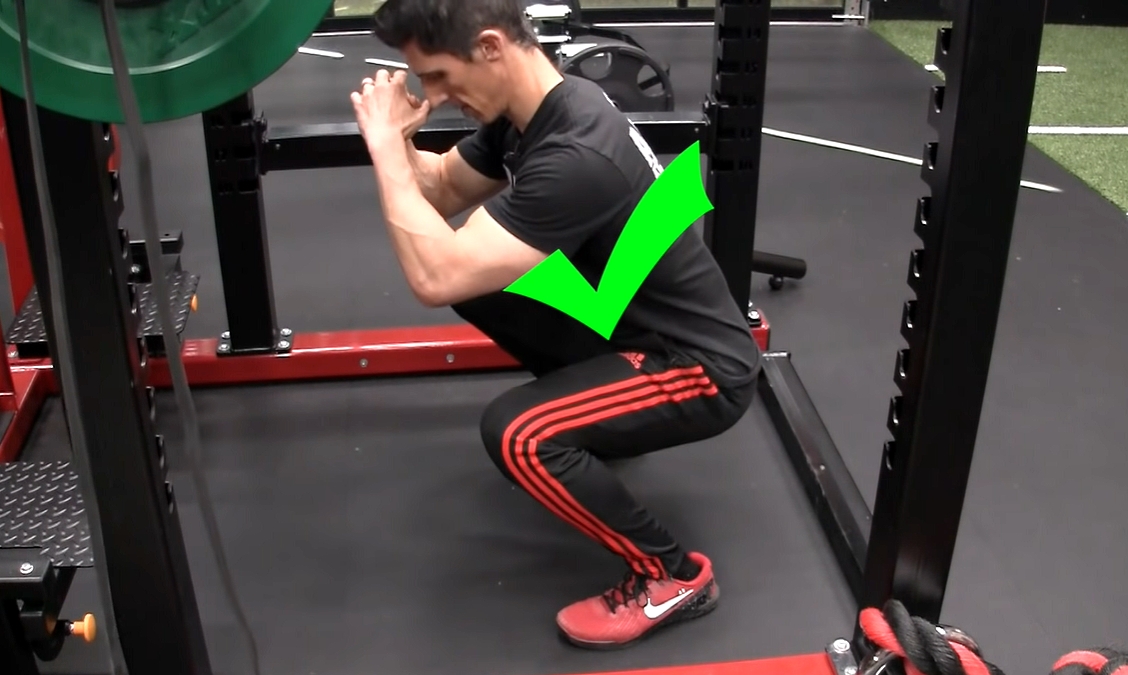
Many people make their (lower) back rounded when they squat deeply, the so-called butt wink. This can cause back pain. Usually a butt wink is caused by limited ankle and hip flexibility and (ergo) limited mobility of that joint. That means you have to work on that or squat less deeply.
 Especially if you use heavy weights, the butt wink can lead to serious back problems. (Source: Movement Enhanced )
If you do manage to do a full squat without any problems, then go ahead. You will have to drop weight, but the greater ROM means that the glutes are activated more, research shows. Full squats are even said to be twice as effective for the glutes as the hip thrust, yet considered by many to be the king of glutes.
On balance, it probably doesn’t matter for the quadriceps whether you go parallel or deep. If you don’t aspire to a ‘squat ass’, you better avoid any risks and don’t go ATG.
KNEES PAST THE TOES?
It’s perfectly normal and not a problem for your knees to extend past your toes on a parallel or deeper squat. YouTube icon Jeff Cavaliere recently devoted a video to it, in which he delivers his ‘final verdict’.
 Jeff has spoken: “When done right, you’ll have a bottomed out position of the squat that places your knees over your toes, but results in no knee pain and a stronger, more biomechanically sound squat.” (Source: YouTube / ATHLEAN-X )
Make sure that your knees point towards the toes at all times (see point 7).
13. HOLD YOUR BREATH
A mistake many people make is that they exhale in the bottom position of the squat, which releases the intra-abdominal pressure and causes the lower back to arch. The muscles in your lower back have to compensate for this. With relatively light weights you may still get away with this, but with heavier weights injuries are lurking.
14. DON’T PAUSE
After you have squatted to parallel or, if desired, a little lower, you immediately shoot back up. So do not pause in the lowest position, but use the stretch reflex . It makes you stronger in the upward movement, the concentric phase of the squat.
CONCENTRIC PHASE
15. LOOK IN FRONT OF YOU
Many people look up at the upward movement of the squat. Several coaches and personal trainers even advise that. However, it is a good idea for your spine, which includes your cervical vertebrae, to keep it in a neutral position. That means not only maintaining the natural curve in your lower back, but also keeping your neck ‘straight’, ie in line with the rest of your spine.
In practice, this means that you look at a point on the floor, approximately two meters in front of you. Not to the ceiling.
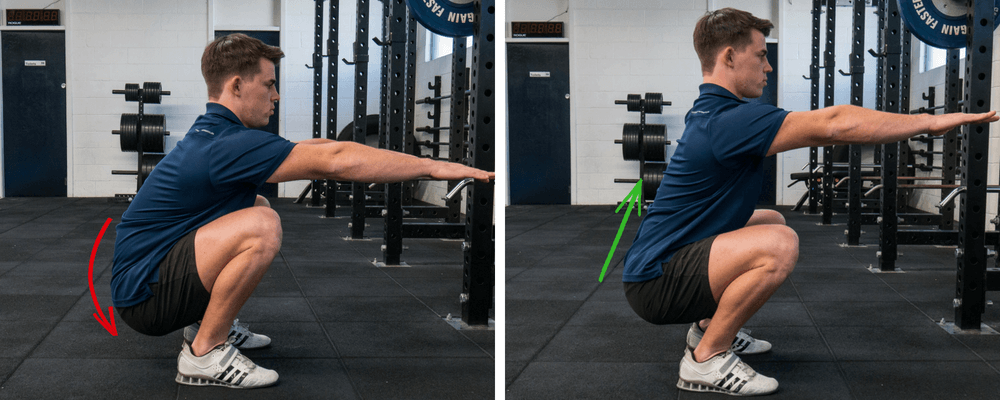
16. MOVE YOUR HIPS AND CHEST STRAIGHT UP
Squat up by moving your hips and chest straight up at the same time. If your hips rise faster than your chest, you’ll lean forward, turning the exercise into a good morning . Especially if you use large weights, as is usually the case with a squat, that is dangerous for your lower back.
Move your hips straight up to the ceiling, not forwards or backwards. When you move them forward, your knees also move forward, at the expense of your strength. If you move them back, your knees will go back and you will lean more forward to keep your balance.
As in the eccentric phase, the bar in the concentric phase should move in a vertical line above the center of your feet. Keep your knees pointing in the direction of your feet.
17. EXHALE
Exhale with the squat only during the upward movement, past your sticking point. That’s the point in the upward movement when you slow down and have the hardest time. Also, don’t exhale all at once, but pretend you’re blowing through a straw.
There you go, you have now performed a perfect squat. On to the next rep…