The barbell bench press is perhaps the most popular exercise among bodybuilders. However, its implementation leaves much to be desired. Apart from a certain nonchalance, this has to do with a misunderstanding of the exercise. On paper a chest exercise, the bench press is actually an exercise for your entire (upper) body. If you approach the exercise as such, you’ll be pushing more weight. Easy. In six steps to stronger and safer bench press.
1. SETUP
Many people go wrong before they have even started the exercise. They casually lie back on the bench as if they were going to take a sunbath. The result? Struggling with the rod and sub-optimal performance.
An optimal attempt at the bench press requires a stable base and (muscle) tension from head to toe. You create that tension by positioning your feet slightly back and planting your heels firmly in the ground, tightening your glutes, maintaining the natural(!) curve in your lower back and pulling your shoulder blades together and down. The latter looks like this:
 Build a strong foundation: squeeze your shoulder blades together and pull them down. (Source: ATHLEAN-X)
Ideally, only your buttocks and shoulder blades make contact with the bench. This is in contrast to the ‘arch’ that powerlifters make in this exercise (left image below). Lifting your chest toward the ceiling will naturally create the desired natural arch.
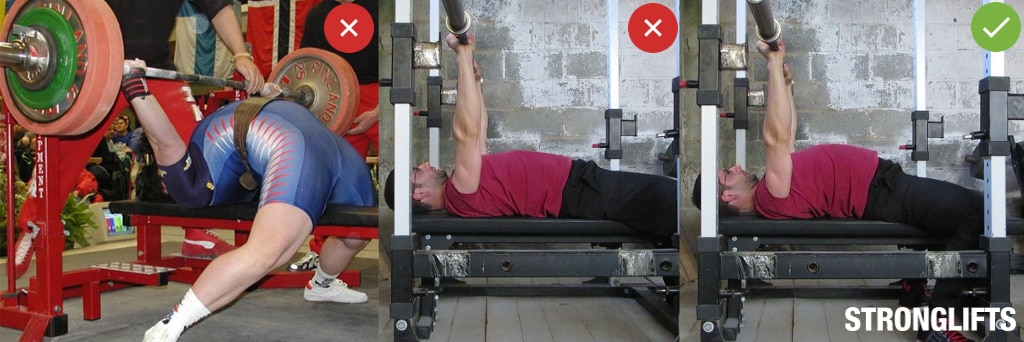 Create an ‘arch’ in your back, but don’t overdo it like in the left photo. (Stronglifts)
Keep your butt on the couch at all times and don’t make it a glute bridge. Use the bar as a handhold to maneuver into this starting position.
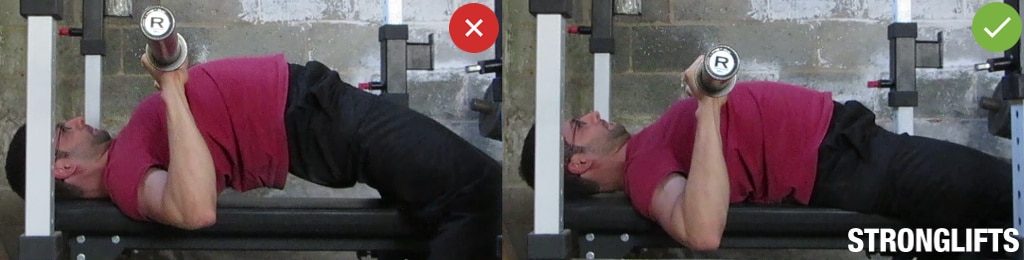 Keep your butt on the couch. (Stronglifts)
2. ELBOW POSITION AND GRIP WIDTH
The ideal angle at which you should position your elbows in relation to your upper body does not exist — it depends on your anatomy. But in general, it should be somewhere between 45 and 70 degrees. If your elbows stick out further, at 90 degrees for example, you can cause shoulder problems. If you turn your elbows in more, so creating an angle of less than 45 degrees, you let your shoulders and triceps do some of the work. In this article we assume that you mainly want to train your chest with the bench press (and not your triceps, for example, as with the close-grip bench press).
The ideal elbow position for you depends on the direction in which the fibers of your chest muscles run. It’s up to you to experiment at which angle you feel your pecs work best at.
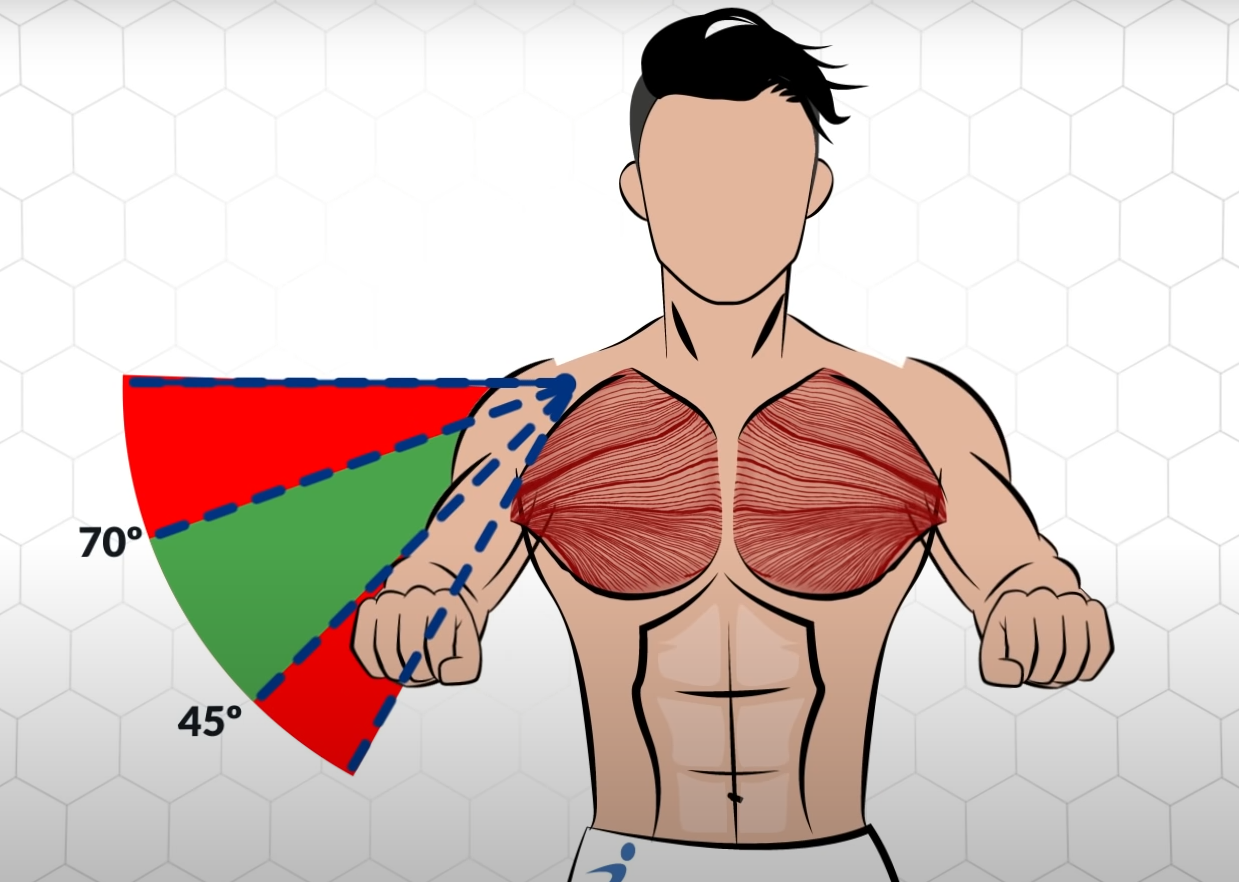 Create an angle of 45 to a maximum of 70 degrees with your elbows with respect to your upper body. (Jeremy Ethier)
The desired position of your elbows also determines which grip width you should use. In general, a medium-wide grip is best, meaning slightly wider than shoulder-width. At an elbow angle of 70 degrees, your grip will of course be slightly wider than if you place your elbows more inward, at 45 degrees for example.
At the bottom of the movement, your forearms should be vertical in both the front and side views, i.e. your elbows are directly under your wrists:
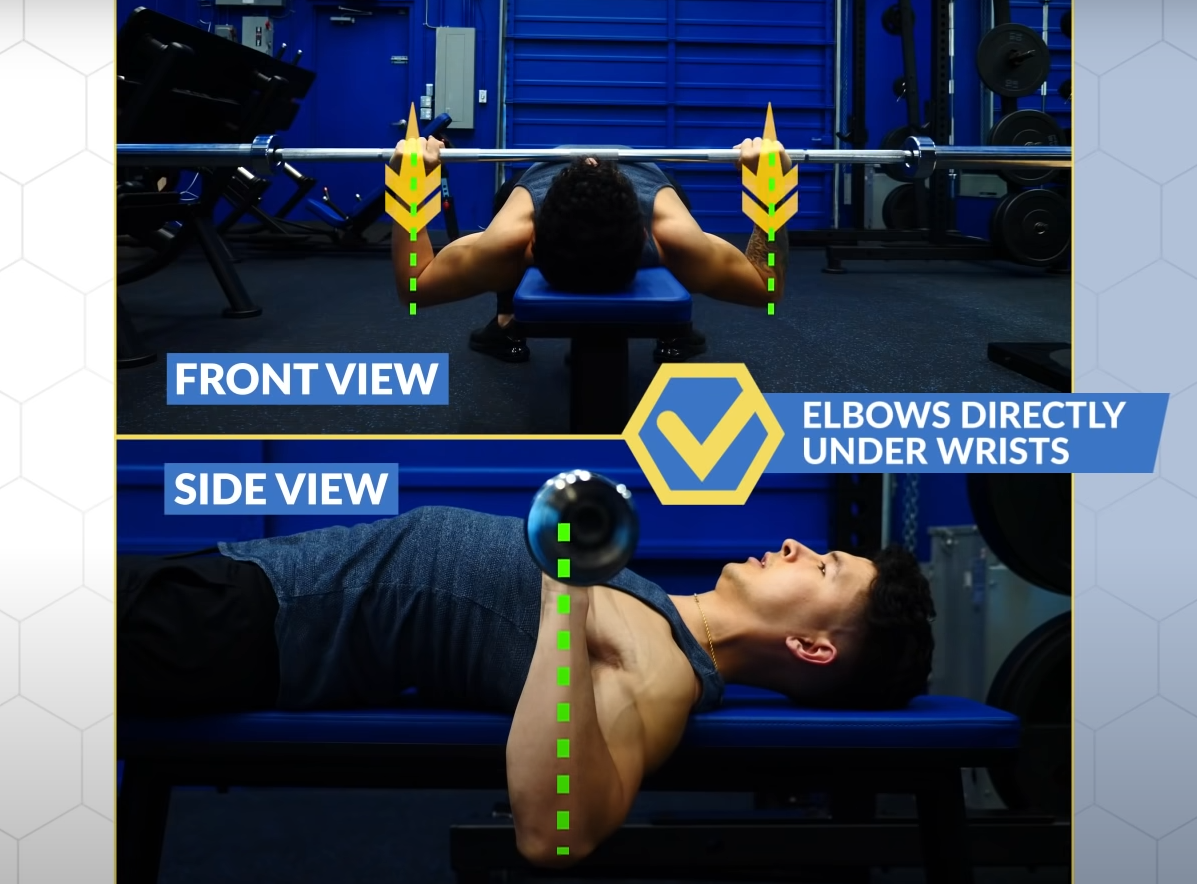 This way you check the correct position of your elbows. (Jeremy Ethier)
Film your bench press to see if you are using the correct grip width.
3. LIFT OUT
All the work from steps 1 and 2 will be for nothing if you lift out the bar incorrectly. Many people use protraction to lift the bar off the barbell supports, bringing the shoulder blades forward and releasing the tension in your shoulders and upper back. This incorrect lifting is facilitated by a too high lip on the front of the j-cups, which hold the bar in place. But most of the time it’s just an execution error. Instead of pushing out, you should more or less pull the bar toward you, like a pullover.
4. LOWERING THE BAR
You are currently one step away from the actual press. Now you probably know that you need to lower the weight in a controlled manner, but instead of trying to hold the weight back, approach this downward phase as if you were performing a (barbell) row. In fact, you pretend that you encounter resistance in the opposite direction and you pull the bar towards you. This will help you get into an even better starting position for the actual press. It is best to practice this with a training partner who is trying to work against you, as it were.
Another tip you’ve probably heard is to squeeze or pull the bar apart as hard as you can, as if you were trying to extend a telescopic bar. Better advice is to try to bend the bar slightly, away from you that is. Or by pulling the ends towards you.
5. BAR CURVE
The biggest misconception about the bench press is that people think the bar moves in a straight line. If you bench press like that, you’re less strong. In addition, it can cause shoulder problems. The correct curve for your stance is from directly above your shoulders to the center of your chest (about your nipples) and back to directly above your shoulders. So like this:
6. LOCKOUT
Finally, it is important not to relax during your lock-out, the last phase of the exercise where you extend your arms all the way. Many people make more or less the same mistake here as when lifting the bar: they give the weight one last push, causing the shoulders to come forward and your upper back to relax.
Remember: a rep is complete when your arms are fully extended; it makes no sense to move the bar past your original starting position.
FINALLY
As an apparently easy exercise, with the bench press often little attention is paid to a technically correct execution. And that’s a shame, because it saves you pounds and reps. Therefore, pay a little more attention to your technique during the next bench session based on these points of attention. Bet you will improve immediately?